Showing posts with label recipe. Show all posts

Friday, May 20, 2011

Easy Crunchy Asian Salad

During the warm weather months I have a serious aversion to eating warm or hot food. If I could afford it, I would go to our local grocery store every day and make myself a nice big salad from their amazing salad bar- but that ends up costing between $6 and $8 depending on how much fruit I add.  I've tried buying all the necessary ingredients to my make my salad at home, but for some reason it just never tastes as good as the one from the grocery store!

I tried to find other salad options and there just didn't seem to be anything I really loved- that is, until a few weeks ago at a potluck dinner at our church.  One of the ladies made a most delicious Asian crunchy salad and I thought it was maybe something that would be a good easy, healthy and cheaper salad for me to make at home.  I tend to screw things up when I make them and nothing ever tastes as good when I make it as it does when someone else makes it, but with the recipe she gave me, it was almost impossible to mess up.  And it tasted just as good!

This recipe makes for a great meal in the hot summer because it's easy and light, but still very filling.
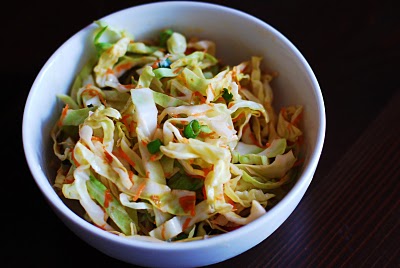


Asian Crunchy Salad

*  1 envelope packet of Good Seasons Italian Dressing and Recipe Mix
*  2 Tablespoons of soy sauce  (use Kikkoman, it's the best soy around!)
*  1/2 Cup of sugar
*  2 packages of any ramen noodle soup (you will just be using the noodles)
*  2 (16oz) packages of coleslaw blend or you can shred your own lettuce and carrots
*  4 sliced green onions
*  1/2 Cup of sliced almonds
*  1/2 Cup of sunflower kernels (optional)

(You can add other ingredients, like a meat and/or fruits, to suit your tastes- I sometimes like to add cold chicken and craisins)


Directions

*  You are first going to make the salad dressing in a separate bowl
*  Follow the instructions on the back of the packet of the Good Seasons Italian Dressing mix
*  Whisk in the soy sauce and sugar
*  Once you've done that, put it in the refrigerator to get in nice and cold.
*  Break the ramen noodles apart in another larger bowl. I think it's easier to do the majority of the breaking up while it's still in the package and then put in the bowl.  That way it doesn't make a big mess.  You won't be using the seasoning packet.
*  Add the coleslaw/lettuce and carrot blend, onion, almonds, and sunflower kernels into the bowl with the ramen noodles and gently toss together
*  Once the salad dressing is at the temperature you'd like, add the salad dressing and toss to coat.
*  I prefer to put my lettuce mix into a bowl that has a lid or a Ziplock freezer bag, add the dressing, put on the lid or seal the bag, and then shake it until everything is nice and well coated. Do whatever works best for you.
*  After you've thoroughly mixed the salad, serve immediately.
*  And that's it!  It's seriously the easiest thing to make and it's delicious!

You can read about another one of my favorite, easy to make, main course dishes here.

post signature

Wednesday, September 1, 2010

The Air Up There

There is something about this "cun-tree" air that just makes me want to sleep and sleep.  (that's how they say country down here in the Middle of Nowhere, North Carolina)  I think it has something to do with how quiet it is here combined with some unknown sleep factor.  We wake up early every day and do farming type things, then we eat lunch and everyone takes a nap. Today we went into town and at about 2pm, Spencer, Great-Gran, and I started yawning and all we could talk about was how much we wanted to take a nice long nap.  Since town is about a 30 minute drive away and we were smack dab in the middle of errands, there was no nap to be had by any of us. 

But that didn't stop me from being productive- in fact, I actually baked one of the best things I've ever, in the history of time, made.  It's for breakfast tomorrow, but when it came out of the oven it just smelled so delish that we had to have a slice before wrapping it up. Want to see?


It's the most delicious cinnamon and sugar bread and I think it's the best thing that I've ever made.  I used the Pioneer Woman's recipe and made a few tweaks to it.  Here's my version for your viewing pleasure!

Ingredients
  • 1 cup Milk
  • 6 Tablespoons Butter
  • 2-½ teaspoons Active Dry Yeast
  • 2 whole Eggs
  • ⅓ cups Sugar + 2 Tbsps
  • 3-½ cups All-purpose Flour
  • 1 teaspoon Salt
  • 2/3 cups Sugar
  • 3 Tablespoons Cinnamon
  • Egg And Milk, Mixed Together, For Brushing
  • Softened Butter, For Smearing And Greasing

Directions 
  • Melt butter with milk. Heat until very warm, but don’t boil. Allow to cool until it's very warm, but not quite hot. (Should not be steaming) Sprinkle yeast over the top and stir gently. Let it sit for 10 minutes.
  • Combine flour and salt.
  • Blend sugar and eggs with a mixer. Pour in milk/butter/yeast mixture (after it's sat for 10 mins) and stir to combine. 
  • Add half the flour and beat on medium speed until combined. Add the other half and beat until combined. 
  • At this point it might be too difficult for you to use your regular mixer.  If you have a KitchenAid mixer, you will be fine, but if you don't, you'll have to knead the dough yourself for at least 10 minutes. The dough should not be too sticky and if it is, add a little more flour and keep on working the dough until it's right.
  • In a large bowl, drizzle in a little canola oil, then toss the dough in the oil to coat. Cover bowl in plastic wrap or a with a clean cloth and put it in the microwave for at least two 2 hours.
  • When the two hours are up,  Turn dough out onto your work surface and punch it out.
  • Roll into a neat rectangle no wider than the loaf pan you’re going to use, and about 18 to 24 inches long. 
  • Smear with 2 tablespoons of melted butter.
  •  Mix sugar and cinnamon together, then sprinkle evenly over the butter-smeared dough. Starting at the far end, roll dough toward you, keeping it tight and contained. Pinch seam to seal. 
  •  Smear loaf pan with softened butter. Place dough, seam down, in the pan. Cover with plastic wrap, put in back in the microwave and allow to rise for 2 more hours. 
  •  Preheat oven to 350 degrees.
  •  Mix a little egg with milk, and smear over the top. 
  •  Bake for 40 minutes on a middle/lower rack in the oven. 
  •  Remove from the pan and allow bread to cool

After all that work, you'll have the best cinnamon and sugar break that you've ever tasted.  And you can do fun things with it like this, haha!


post signature

Thursday, April 29, 2010

The Joy of Eating

One day I hope to become a woman who actually feels The Joy of Cooking.  What I do have is The Joy of Eating, which gets me through the cooking part that's much less enjoyable than the eating part.  It's been my experience that when I cook, no matter what it is or how delicious it tastes, I just don't feel like eating it after it's made.  It's like my brain knows how much effort went into the process and it won't allow me to enjoy it. This all changed for me on Sunday afternoon- or what will always be remembered as The Day I Fell in Love With the Heavenly Inspired Carrot Cake.  I won't kid you, this cake takes a lot of work and it's probably not something that I would have ever undertaken alone. But now that I know it's power to transform and delight, I'm telling you to MAKE IT! And make it now, like pronto. 

Cake Ingredients:

*  2 cups all-purpose flour
*  2 teaspoons baking soda (buy new baking soda or used an unopened one, seriously)
*  2 teaspoons ground cinnamon
*  1/2 teaspoon salt
*  3 Large Eggs at room temperature
*  2 cups of granulated sugar
*  3/4 cup vegetable oil
*  3/4 cup of buttermilk
*  2 teaspoons vanilla extract (pure, not imitation)
*  2 cups grated carrots (about 3 large carrots)
*  1 cup crushed, drained pineapple 
*  3 and 1/2 ounces sweetened flaked coconut
*  1 cup chopped pecans or walnuts

If you don't like some of the extra ingredients, ie., walnuts or coconut, you don't have to include them, but I can tell you that you won't notice that they're in the cake when you're eating it.

Directions for Cake:

1.  Whisk together the flour, baking soda, cinnamon and salt. 


2.  In a large separate bowl, add the eggs, sugar, vegetable oil, buttermilk, and vanilla extract- beat with an electric mixer at medium speed until it's smooth.
3.  Add the flour mixture to the egg mixture and blend at a low speed.  (It's best to add 1/2 of the flour mixture and blend and then add the other half and blend.)
 
4.  Fold in the carrots, pineapple, coconut, and pecans/walnuts.  (To "fold in" means you add the ingredients and gently "fold over" the batter onto the carrots, etc., and gently mix together.  You want the ingredients to be evenly mixed throughout the batter but you want the added ingredients to remain intact.)


5.  Pour the batter into a greased and floured 13x9 inch pan.
6.  Bake at 350 degrees for 30 minutes.  After that 30 minutes, loosely cover the pan with tin foil and continue baking for another 13 minutes.  Toothpick test to determine if it's done.

While the cake is baking it's time to start the next step that makes this carrot cake the best thing in the world- the buttermilk glaze.

Buttermilk Glaze Ingredients:

*  1 cup granulated sugar
*  1 and 1/2 teaspoons baking soda
*  1/2 cup of butter or margarine 
*  1/2 cup buttermilk
*  1 tablespoon light colored corn syrup
*  1 teaspoon of vanilla extract

Directions:

1.  Mix the sugar, baking soda, butter, and corn syrup and bring it to a boil in a double boiler/Dutch oven over medium-high heat. Stir frequently
(Our makeshift double boiler)

2.  Boil for 4 minutes or until the mixture is a golden brown, stirring very often to constantly.
3.  Remove from heat.
4.  Stir in vanilla extract
5.  You should finish the glaze about the same time your cake comes out of the oven.  As soon as the cake comes out, evenly pour the glaze over the cake (use all of it).  Don't worry if it pools up, the cake will absorb the glaze.
6.  Set aside to cool completely in pan.  You should not even attempt to ice this cake until at least an hour after you've taken it out of the oven.

Icing Ingredients:

*  1/2 cup (1 stick) softened butter
*  1 (8 oz) package of cream cheese, softened
*  1 (3 ox) package of cream cheese, softened (yes, this is correct- you want want a total of 11 ozs. of cream cheese.
*  1 lb (16 ozs.) of powdered sugar
* 1 and 1/2 teaspoons vanilla extract

Icing Directions:

1.  Beat the butter and cream cheese at medium speed until very creamy
2.  Add the powdered sugar and vanilla sugar.
3.  Beat on high for about 20 seconds or until very smooth.  
4.  Ice your cake!

If you can wait, which is next to impossible to do, put in the refrigerator after you've iced it and let it get nice and cold.  And then the only thing left to do is sit back and savor each delicious bite!


post signature

Friday, December 11, 2009

Show Us Your Life - Christmas Cookies


This week on Show Us How You Live over at Kelly's Korner, we're showing off our Christmas cookies. My grandma was the baker in our family and every Christmas she'd spend an entire weekend doing nothing but making cookies. These are cookies that I liked the best from her smorgasbord
Chocolate Coconut Macaroons

Makes 24


Ingredients
  • 4 - 14 oz bags sweetened coconut flakes
  • 2 - 14 oz cans sweetened condensed milk
  • 1/4 cup sour cream
  • 2 tbsp heavy cream
  • 2 tbsp vanilla extract (not imitation)
The Chocolate Ganache
  • 4 ounces semi-sweet chocolate, finely chopped
  • 1/2 cup heavy whipping cream


Directions

Pour 3 bags of coconut flakes into your mixer and then pour the condensed milk, sour cream, cream and vanilla on top of the coconut flakes.
Turn the mixer to a slow speed.
With the mixer running, slowly add the fourth bag of coconut flakes.
Mix for about 10-15 seconds until combined then stop.
Scrape the paddle with a spatula and give the the batter a few turns to make sure all the ingredients are well distributed.
Preheat the oven to 325 degrees F and cover your sheet pans with parchment paper.
Using a large ice cream scoop, scoop out the macaroons and slightly press together. They need to be able to keep their shape once they're on the cookie sheet. Then place the cookie sheet into the oven and bake for 10-12 minutes. The bottom of the macaroon should be lightly caramelized. Then let cool.
The Chocolate Ganache

Place the chopped chocolate in a medium sized stainless steel bowl. Set aside. Heat the cream in a small saucepan over medium heat. Bring just to a boil.

Immediately pour the boiling cream over the chocolate and allow to stand for 5 minutes. Stir with a whisk or spoon until smooth. Let cool to room temperature before dipping in your already cooled macaroons.
Dip in chocolate to taste and then put all of the macaroons into the refrigerator. It helps the chocolate dry nice, shiny and smooth. Once the chocolate ganache has completely hardened, they are ready to eat!


Pressed Butter Cookies


Ingredients


  • 1lb butter
  • 1 full cup sugar
  • 4 cups flour
  • 1 tsp baking powder
  • 1 egg
  • 1 tsp vanilla


Directions


Preheat oven to 350 degrees.


Cream the butter and sugar together


Mix in egg and vanilla


Add flour, baking powder, and sugar and mix until well blended.

Using a cookie press, in the shape of your choice (mine is my grandma's old star press), press out your cookies onto a chilled, ungreased cookie sheet. Try and not make them too small, or they'll burn. Bake 10-12 minutes, removing at the first hint of brown around the edge.

Decorate them how ever you like- I prefer a less is more approach, because I want to taste the cookie more than anything else. (P.S This is my dad's favorite cookie and he likes them plain, not one things added to it.)
And those are the cookies I make every year. I hope ya'll enjoy them as much as I do.


**More Show You How I Live Posts**


post signature

Thursday, September 24, 2009

Show Us Your Life - Go To Dessert Recipe


This week on Kelly's Korner Show Us How You Live, we're continuing with the recipes, but this time it's our favorite go-to dessert recipe. I'm finding this to be very difficult, because there are just so many wonderful desserts out there, I could bake my whole life and still there would be more things to try. I have a two favorite recipes, the first takes a little bit more time, but it's SO worth it, and the second is great recipe for when you need something yummy in a hurry or with minimal effort.

For a great, gooey, sinfully delicious taste of chocolate bliss, it's these wonderful chocolate cake brownies. I did a whole post on it here - Look at it here - but here's a shortened version of that post. There are only a few ingredients, and I'm pretty sure you'll already have everything hiding somewhere in your pantry or cabinets - all you need is sugar, flour, salt, butter, cocoa, baking soda, buttermilk, eggs, vanilla, powdered sugar, and milk. If you don't have buttermilk - which I NEVER do, here is a trick: In a measuring cup, add 1 tablespoon of lemon juice or white vinegar and then add enough regular milk so that it equals 1 cup. Let it sit for 5 minutes before stirring and Voila, buttermilk.
The Best Chocolate Cake/Brownies EVER


Combine in a mixing bowl:


  • 2 cups flour
    2 cups sugar
    1/4 teaspoon salt
In a saucepan, melt:
  • 2 sticks butter
  • Add 4 heaping tablespoons cocoa.
Stir together.
  • Add 1 cup boiling water, allow mixture to boil for 30 seconds, then turn off heat.
  • Pour over flour mixture, gently stir until it cools down a bit.
In a large measuring cup:
  • pour 1/2 cup buttermilk
  • Add 2 beaten eggs
  • 1 teaspoon baking soda
  • 1 teaspoon vanilla
Stir buttermilk mixture into butter/chocolate mixture.


Pour into sheet cake pan and bake at 350-degrees for 20 minutes.
While cake is baking, make icing:

  • Melt 1 3/4 sticks butter in a saucepan.
  • Add: 4 full tablespoons of cocoa,
Stir to combine, then turn off heat.
  • Add: 6 tablespoons milk
  • 1 teaspoon vanilla
  • 1 lb minus 1/2 cup powdered sugar

Stir together and as soon as it's mixed very thoroughly, pour it over your warm cake that you just pulled out of the oven.


Be careful not to pour too much at time, it thickens as it cools, but when your first put it on there, it's still pretty thin.


And that's it. Let it cool and then enjoy!


The next recipe is one of my Mema's. I have all her old recipes that she wrote down and saved in her cooking files. This one is an easy cheesecake. Mema didn't believe in "No Bake" anything, but she also didn't like to spend hours working on a cheesecake. When she was in a pinch she'd use this one and she said no one would ever know the difference. It's much easier than the ones I use to make, but it's just as delish. Hope you enjoy it!

Easy as Pie Cheesecake

Ingredients:
  • One 8 oz package of cream cheese, softened
  • 1/3 cup of sugar
  • 8oz of whipped cream (or cool whip if you want to make it a little more healthy)
  • One Graham Cracker crust. If you don't want to use a store bought one, here's an easy recipe.
Whipped Cream - You can always use store bought whipped cream, but to make your own you'll need :
  • 1 cup heavy cream
  • 1/4 cup sugar
  • 1 teaspoon vanilla
Whip the cream until it's almost stiff. Then add the sugar and vanilla and beat until the cream is able to hold a peak. (If you were to spoon out a dollop, it should have a point that doesn't sink into itself.)

Directions:


Beat(in an electric mixer) the cream cheese and sugar. Mix until very well blended.
Gently stir/fold in the whipped cream or cool whip.
Pour into your crust and refrigerate at least 2 hours.
That's it!


**More Show You How I Live Posts**

Favorite Go To Dinner Recipe
My Baby Shower
School Pictures
Favorite Vacation Spot
I Have a Child. The Jig is Up.
Here Comes the Maid Of Honor


post signature

Thursday, September 17, 2009

Show Us Your Life- Go To Recipe


This week on Show Us How You Live, the topic of the day is our "go-to" recipe. I'm not much of a cook, but I've made this recipe many times and it's easy and delish!


Hidden Valley Ranch Crispy Chicken

1/2 c. butter
3/4 c. corn flake crumbs
3/4 c. Parmesan cheese
1 pkg. of Hidden Valley Ranch salad dressing mix (powder)
Make sure that you use the powdered mix and not the actual dressing. It's in the same aisle as the regular ranch.

Combine corn flake crumbs, Parmesan cheese and dressing mix in a zip-lock baggie- set aside. Melt butter. Dip chicken in melted butter and then coat chicken with crumb mixture. Put the piece of chicken in the baggie (one at a time), seal it up, and shake it until it's coated. Bake uncovered at 350 degrees for 45 minutes.


I like to cut my chicken breasts in half to make them thinner, so if you do that, it doesn't need to cook for 45 minutes. For me, it's 25-30mins, but if you make this way, just see what works for you and your oven.
That's it- Enjoy!


**More Show You How I Live Posts**

post signature

Wednesday, August 19, 2009

Raspberry Freezer Jam

Even for someone as kitchen-challenged as me, this recipe is pretty easy and makes the most scrumptious jam!

Ingredients

  • 2 Cups of mashed raspberries (mashed VERY well)
  • 4 cups of sugar
  • 1 Tablespoon of Lemon Juice
  • 3/4 cup of water
  • 1 packet of pectin (1 3/4 oz) Sur-Gel and Easy-Gel are the same thing
Directions
  1. Mash up the raspberries
  2. Mix the raspberries, sugar and lemon juice together. Make sure it's well blended and then let stand for 10 minutes. (Best to mix using a wooden spoon)
  3. While the raspberries are standing, put the pectin and water in a large kettle. Bring to a hard boil for one minute, stirring constantly. (A hard boil can't be stirred down)
  4. Add the raspberry/sugar/lemon juice mixture to the pectin and water. Stir constantly.
  5. Once it reaches a rolling boil, start timing- it's need to be at this hard boil for 3 minutes.
  6. When it's done, take it off the heat and immediately pour it into your jars. The jars need to be completely dry AND HOT. It's best to put them in the oven on 300 degrees for about 10 minutes.
  7. After all your jam is poured and canned, put the jars into the freezer.
  8. After 12 hours you can enjoy your delicious raspberry jam!


post signature

Tuesday, July 21, 2009

My Favorite Recipe- Blog Hop

By far, the best, most delicious thing I have ever made is This Chocolate Brownie/Cake . It is so delicious that I can't make it very often or I'll devour it before it's even cooled off. Trust me, it's TO. DIE. FOR!


It should be illegal to be this delicious.


Me icing the cake/brownie


MckLinky Blog Hop

post signature

Monday, May 18, 2009

After All These Years

When I was in Italy, I was only 20, so recipes and cooking weren't high on my list of priorities. But there was one dish that our host made for us that I loved so much, I had to get the recipe. Somewhere in the jumble of life post-graduation, I lost my Italy notebook that contained the recipe. (Remember, I keep everything!) I was really upset when I couldn't find it because I could not, for the life of me, remember what the name of the recipe was.

I even went to the Italian grocery store in town here and tried to describe the contents of the dish, but they had no clue. And I don't blame them- I was like "It has these things in it that are like nuts, but they aren't, I think, and it can go with pasta, and it's REALLY popular in Italy!" I finally gave up, even though it's irked me all these years. Every time I go to an Italian restaurant I would always check to see if it was on the menu, thinking that if I saw the name written out, I'd recognize it. But that never happened either.

So last night I went into the attic to put some things away (to keep them from Spencer) and I saw an old crate filled with my things. I know I didn't put it up there, so I was curious and started going through it. Most it was junk, an old hula man that sat on the dashboard of my car during high school- type things. But as I neared the bottom, I saw it! A beat up old black notebook that had Italian words written on it. I could the Hallelujah Chorus of the Angels!

I didn't look at anything else in it, I immediately went to the page where I knew the recipe was written. There it was- "Farro Con Pesto." It doesn't seem like it would be that difficult to remember, but it's name has alluded me all these years! It's supposed to be "Farro con il Pesto," but Italian grammar was never my strong suit! haha.


The funniest part of the whole thing is that I wrote it out in Italian and in the metric system! I guess I was trying to assimilate to all things Italian, but the first thing I thought to myself as I read it was "wow, pretentious much?!" Luckily I still know enough to understand the majority of it, so at least that part of my brain is working okay.

I know you're on the edge of your seats for the recipe, which is SUPER easy, delicious, and it will be a great addition to you Vegetarians out there.


Pesto

  • A lot of basil, about 1 and 1/2 to 3 ounces, per your liking
  • Handful of pine nuts, about 1.4 ounces
  • 4 and 1/2 ounces of Extra Virgin Olive Oil
  • 1 tsp. of salt
  • Pinch of garlic- per your liking
  • 1 and 3/4 ounces of Parmesan cheese
Directions
  • Take the basil, pine nuts, and garlic mix them together in a bowl
  • Crush them together and mix well
  • Add oil, salt and Parmesan
Farro
  • Cook 0.55 quarts of Farro (that's a little more than 1/2 of a quart, it's exactly 17.6 ounces)
  • Use a lot of water and salt, and cook for 30 minutes (remember to stir!)
  • Drain the water and refrigerate
  • Mix the farro with the pesto sauce
  • Optional - add 4 tomatoes chopped in small pieces
Buon Appetito!

Some of the conversions are a little wonky, due to the fact that it was in grams. In case you don't know what farro is, or if they tell you it's not at the grocery store, it is sometimes called Emmer Wheat, more specifically, Triticum dicoccon. Here is a picture of it.


post signature

Friday, February 27, 2009

I made these red velvet cupcakes a few weeks ago and Spencer really loved them! Of course she likes anything with sugar, so it's not that hard to please her in the sweets department. Recipe from here


For the cupcakes:
  • 2 1/2 cups all-purpose flour
  • 1 1/2 cups sugar
  • 1 teaspoon baking soda
  • 1 teaspoon salt
  • 1 teaspoon cocoa powder
  • 1 1/2 cups vegetable oil
  • 1 cup buttermilk, room temperature
  • 2 large eggs, room temperature
  • 2 tablespoons red food coloring
  • 1 teaspoon white distilled vinegar
  • 1 teaspoon vanilla extract


For the Cream Cheese Frosting:


  • 1 pound cream cheese, softened
  • 2 sticks butter, softened
  • 1 teaspoon vanilla extract
  • 4 cups sifted confectioners' sugar
  • Chopped pecans and fresh raspberries or strawberries, for garnish
For the cupcakes:

Preheat the oven to 350 degrees F. Line 2 (12-cup) muffin pans with cupcake papers.

Divide the batter evenly among the cupcake tins about 2/3 filled. Bake in oven for about 20 to 22 minutes, turning the pans once, half way through. Tooth pick test before removing from oven and cool completely before frosting.

For the Cream Cheese Frosting:


In a large mixing bowl, beat the cream cheese, butter and vanilla together until smooth. Add the sugar and on low speed, beat til combined. Increase the speed to high and mix until very light and fluffy.

Garnish with chopped pecans and a fresh raspberry or strawberry. I used red sprinkles because Spencer doesn't eat nuts and fresh produce that tastes good costs an arm and a leg in the winter.

Friday, February 20, 2009

The Best Chocolate Cake/Brownies, EVER

I got this recipe from Pioneer Woman, but made a few changes. I didn't put nuts in the icing, but if you want, the real recipe calls for pecans. I also used unsweetened cocoa powder instead of sweetened, and trust me- it was plenty sweet!


I also didn't have buttermilk on hand, so I made my own buttermilk- 1 tablespoon of lemon juice and then add enough regular milk so that it equals 1 cup. Let it sit for 5 minutes and Voila, buttermilk. Then just add how much the recipe calls for.


This was seriously the best chocolate cake/brownies that I have ever tasted. I hope you enjoy!


Combine in a mixing bowl:

  • 2 cups flour
  • 2 cups sugar
  • 1/4 teaspoon salt

In a saucepan, melt:

  • 2 sticks butter
  • Add 4 heaping tablespoons cocoa.

Stir together


  • Add 1 cup boiling water, allow mixture to boil for 30 seconds, then turn off heat.


  • Pour over flour mixture


  • Stir lightly to cool

In measuring cup, pour 1/2 cup buttermilk.


Add:

  • 2 beaten eggs
  • 1 teaspoon vanilla
  • 1 teaspoon baking soda

Pour buttermilk mixture into butter/chocolate mixture.


Stir together with a wooden spoon


Pour into sheet cake pan

Bake at 350-degrees for 20 minutes

While cake is baking, make icing:


  • Melt 1 3/4 sticks butter in a saucepan.
  • Add 4 heaping tablespoons cocoa, stir to combine, then turn off heat.


Add:


  • 6 tablespoons milk
  • 1 teaspoon vanilla
  • 1 lb minus 1/2 cup powdered sugar

Stir together

Pour over warm cake


Spencer LOVED It!